Shortly after pulling the anchor to wrap up a trip to Chandeleur, a friend made a dreadful comment. “I noticed the deck around the pulpit is soft and flexing.” Many Hatteras owners of almost all models have run across this issue, rotten balsa coring.
I knew this was a definite possibility. There are several penetrations through the deck at the pulpit. Keeping them all watertight is very difficult. For a 45 year old boat, some water ingress is inevitable. Prolonged exposure to moisture will eventually cause the balsa coring to decompose.
This project was put off for close to two years for a couple of reasons. Firstly, the cost to have a yard complete this type of repair can be shocking. Bay Marine in Biloxi, MS, which is a reasonably priced yard, gave an estimate close to $20k. Secondly is time. It is a lengthy process, whether done in a boat yard or taken on DIY.
DIY is the route that was chosen. Although overwhelming at first, the repair turned out great. The entire project was completed in the slip at Pass Christian Harbor.
Step 1 – Remove the Pulpit and Windlass
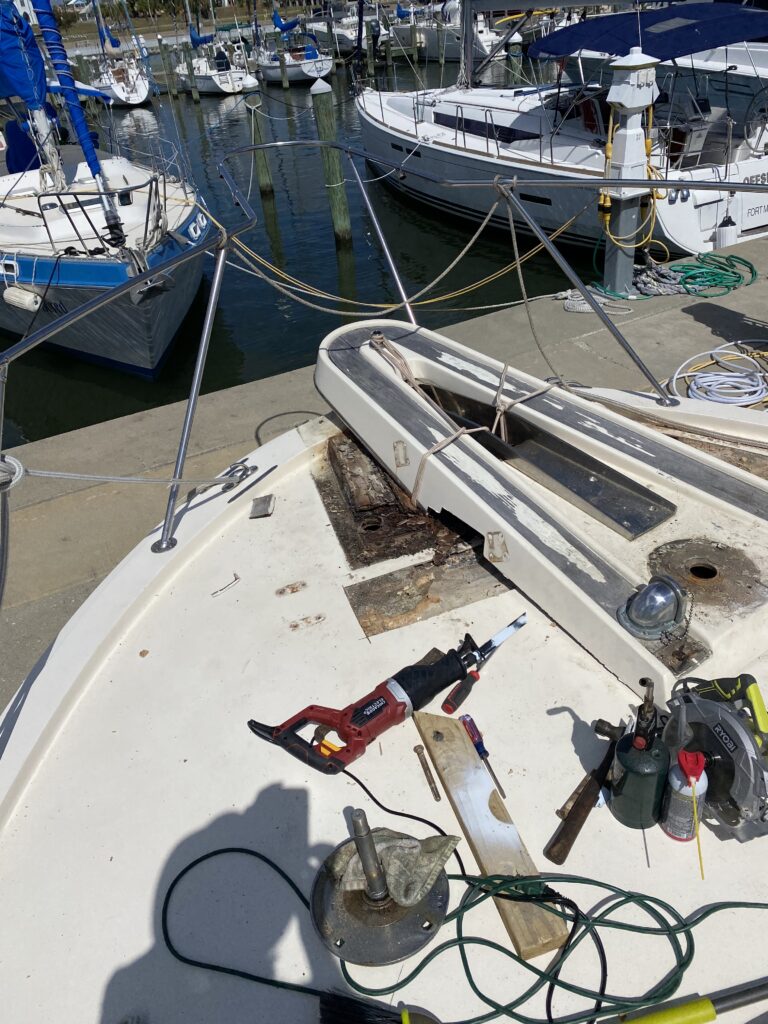
Windlass
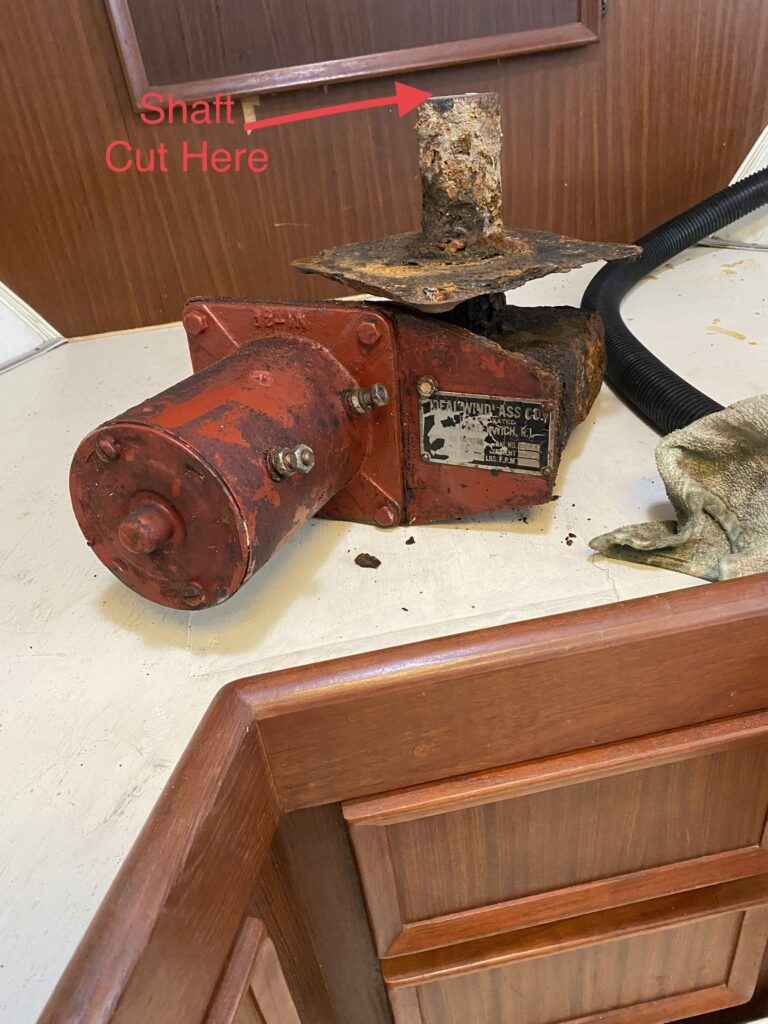
The windlass took muscle, a lot of hammering, and a sawzall to remove. Most of the below windlass hardware (capstan, wildcat, chain stripper) was easily removable. The gearbox was a different story.
The shaft running through the deck from the gearbox has a sleeve over it. After 45 years, the sleeve and the shaft had become one piece of metal. In order to remove the gearbox, the shaft has to slide out down through the deck or be cut above the deck. Cutting was the only option.
The Ideal Windlass motor and gearbox pictured below had to be replaced after the shaft was cut. Luckily, a used, but refurbished full assembly (motor, gearbox, and all deck hardware) was available on Ebay.
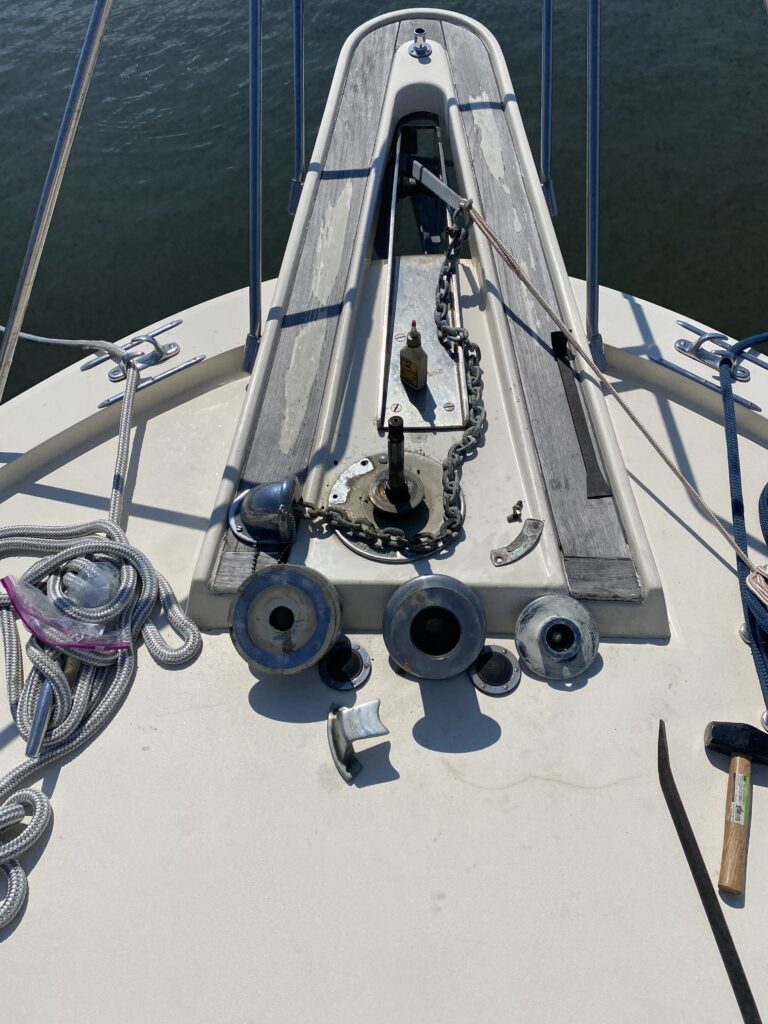
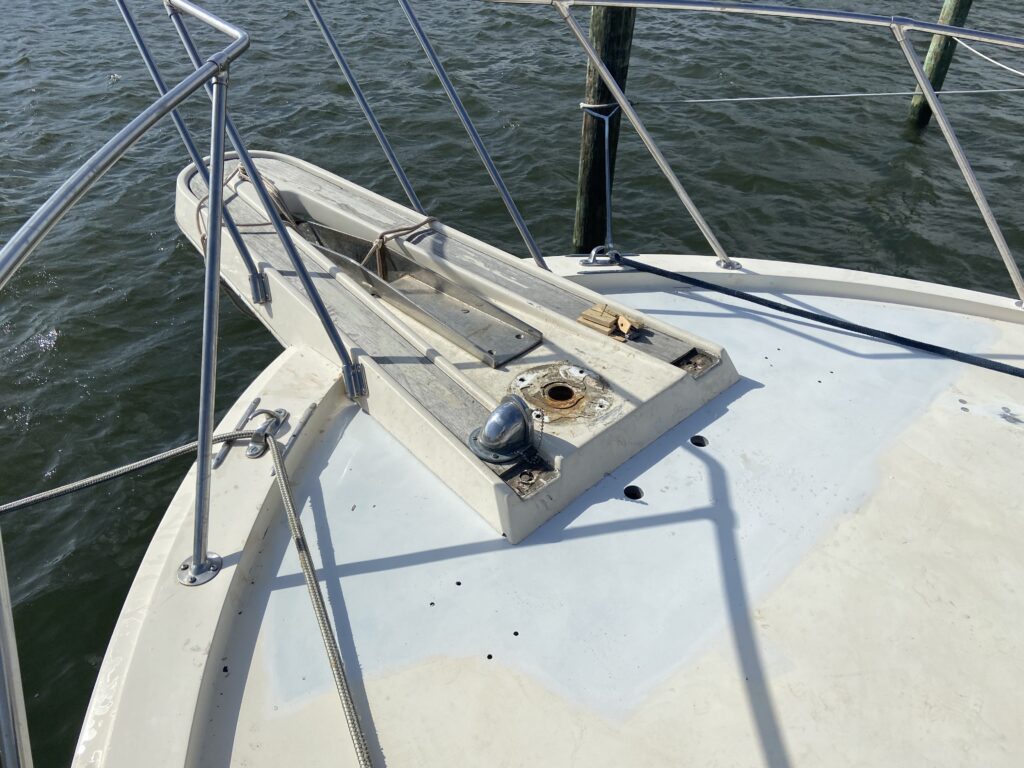
Pulpit
The pulpit came off relatively easily. The handrail posts that tie into the pulpit were removed first. Next, the six bolts securing the pulpit to the deck were removed.
The wood blocking installed below the pulpit, but above the deck had completely disintegrated. The picture below shows how poor of a condition it was in.
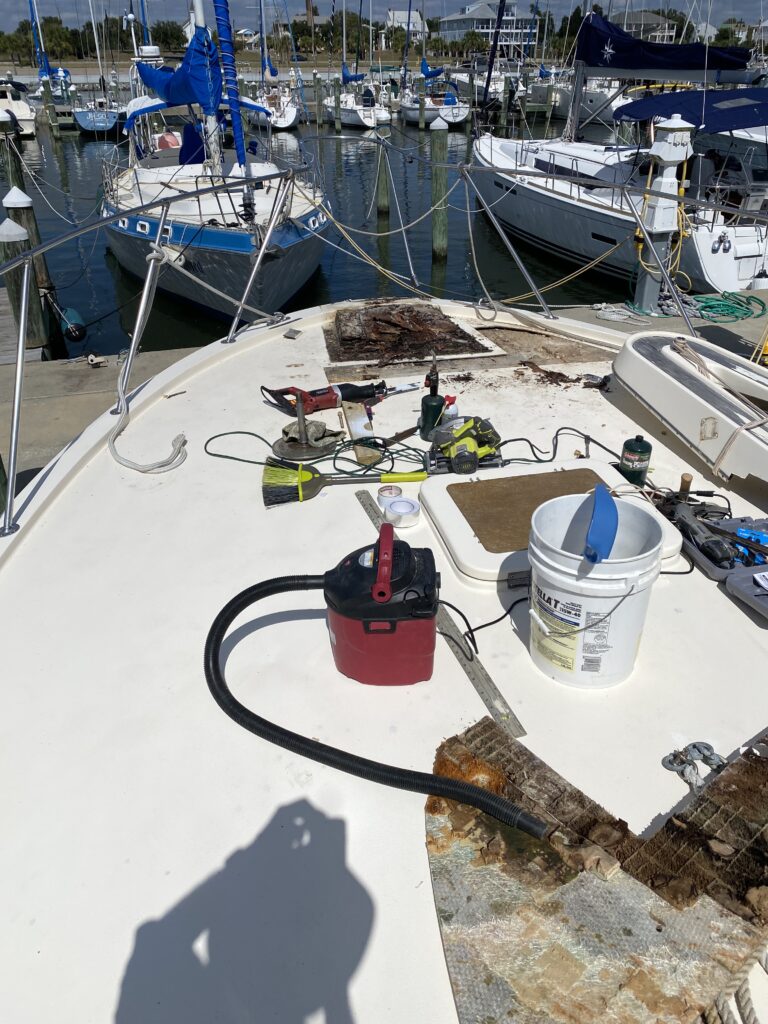
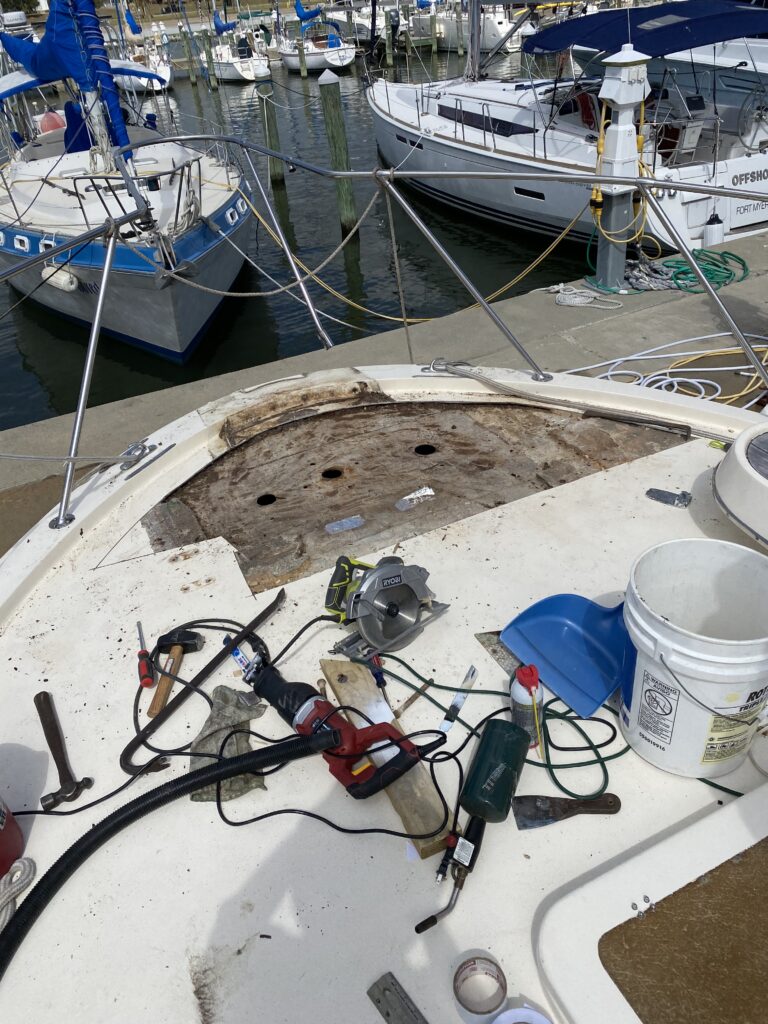
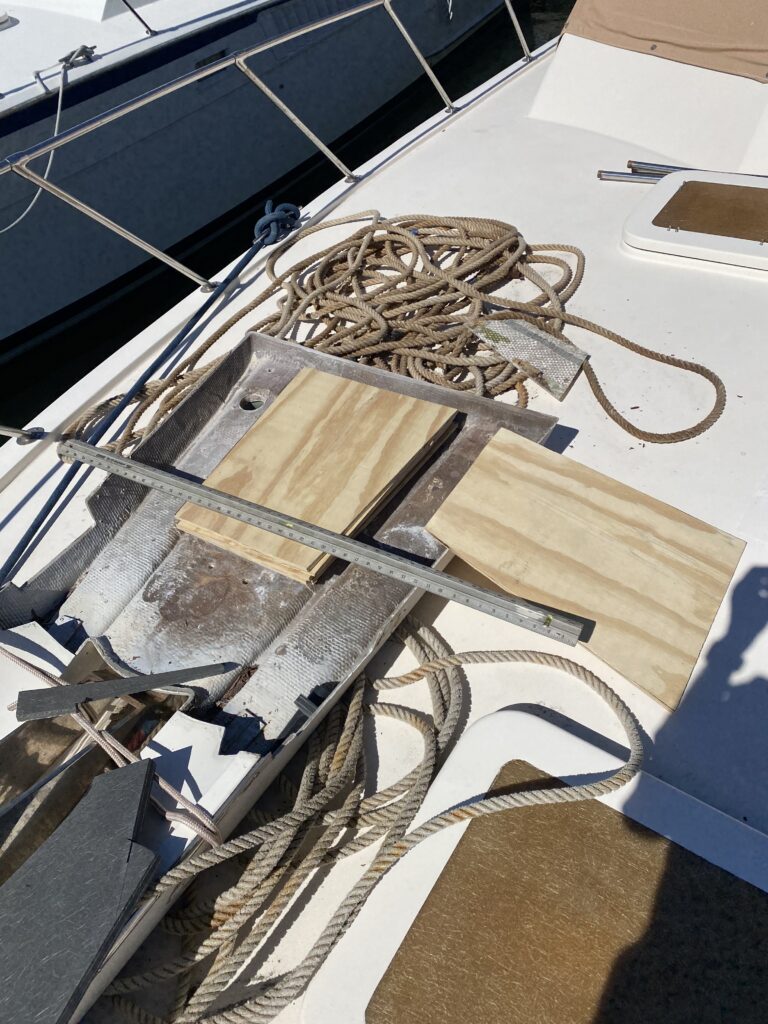
Step 2 – Deck Removal
The fiberglass deck was cut out using a circular saw. From walking on the deck it was easy to feel where the flexing stopped and started. We cut a few inches into the solid decking to ensure all of the rotten balsa could be removed.
The lower section of fiberglass was cleaned using a Dremel tool and scrapers to remove all of the balsa.
Step 3 – Install New Core and Deck
Core
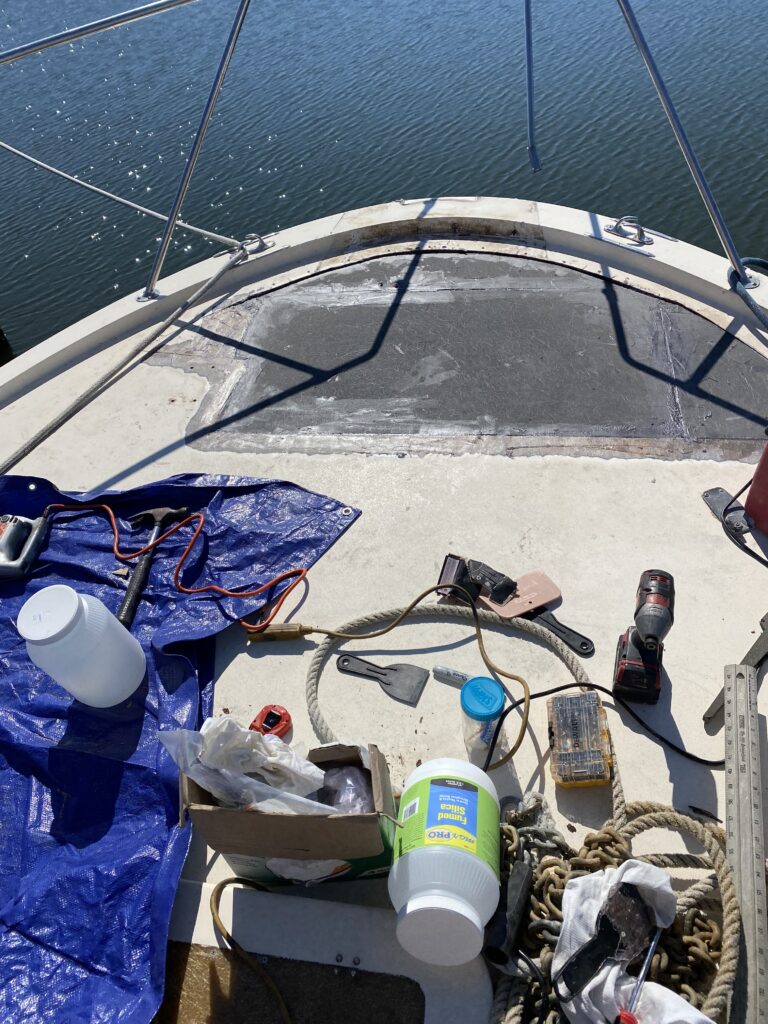
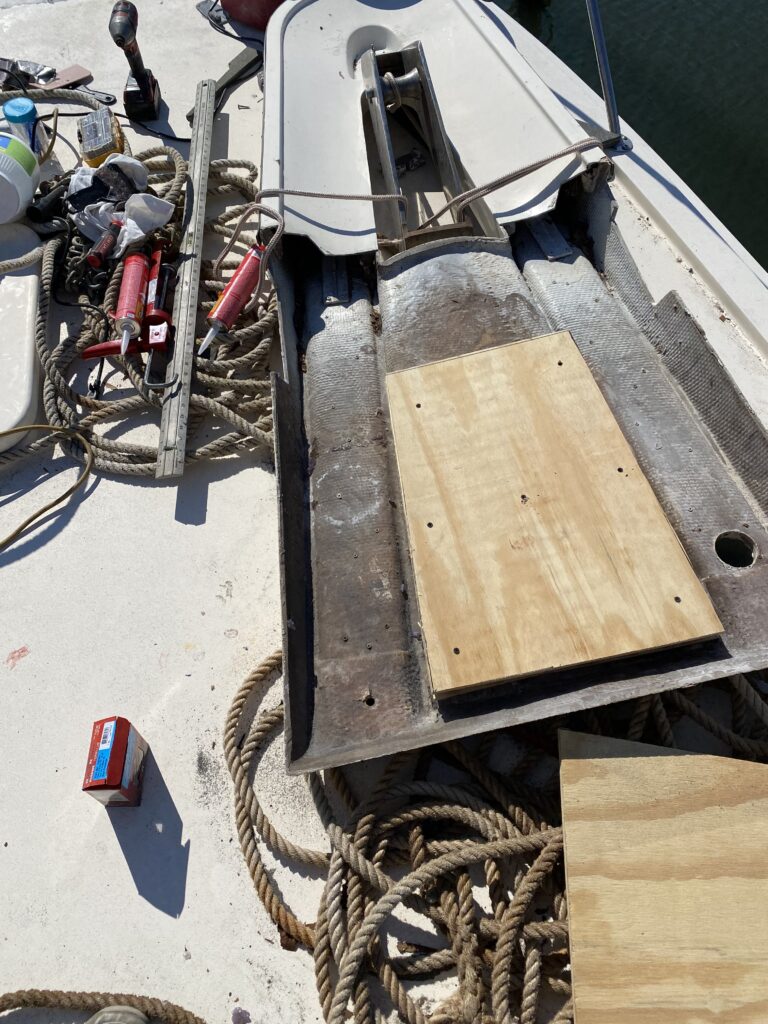
Coosa board was chosen as the new core material. It is a lightweight polyurethane foam that is reinforced with fiberglass. Best of all, it is rot proof. It will not absorb water, and its structural properties are not reduced when exposed to water.
Coosa boards can be cut with the same tools that are used to cut plywood. A circular saw was used to make the necessary cuts to get the board in place on the deck.
The bottom side of the board was bonded to the fiberglass using epoxy resin. All seams were also filled with epoxy resin.
Deck
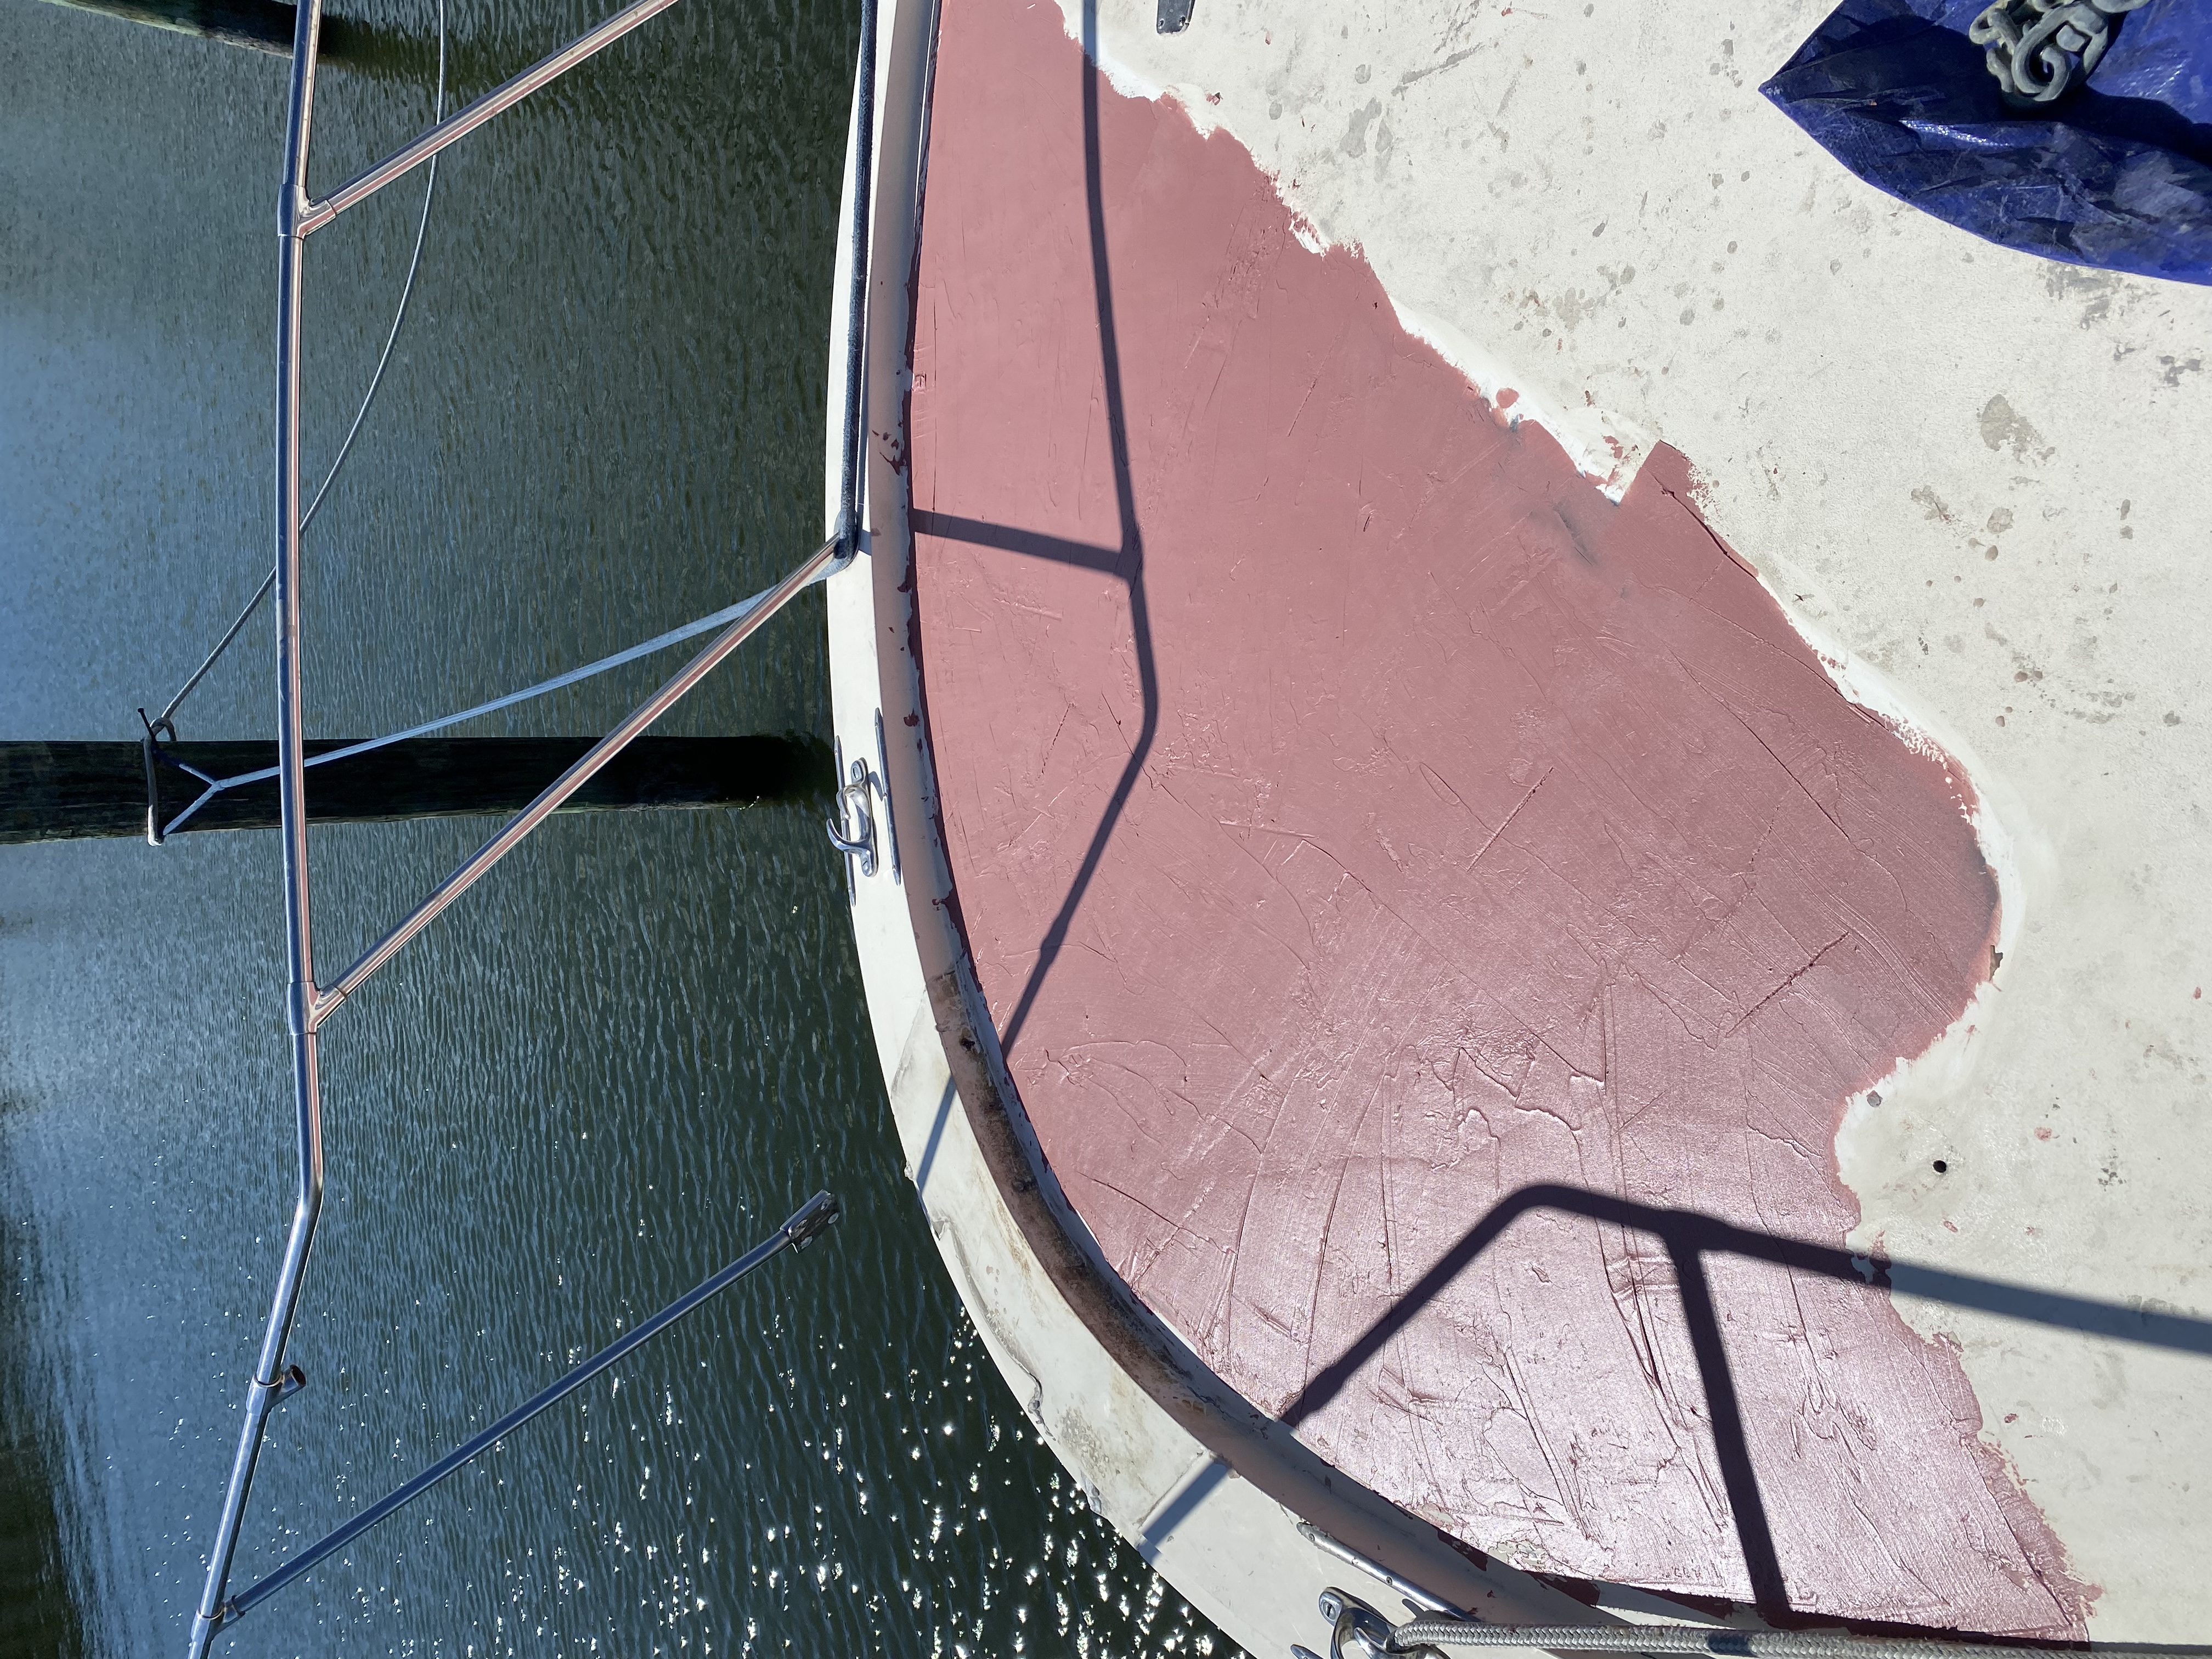
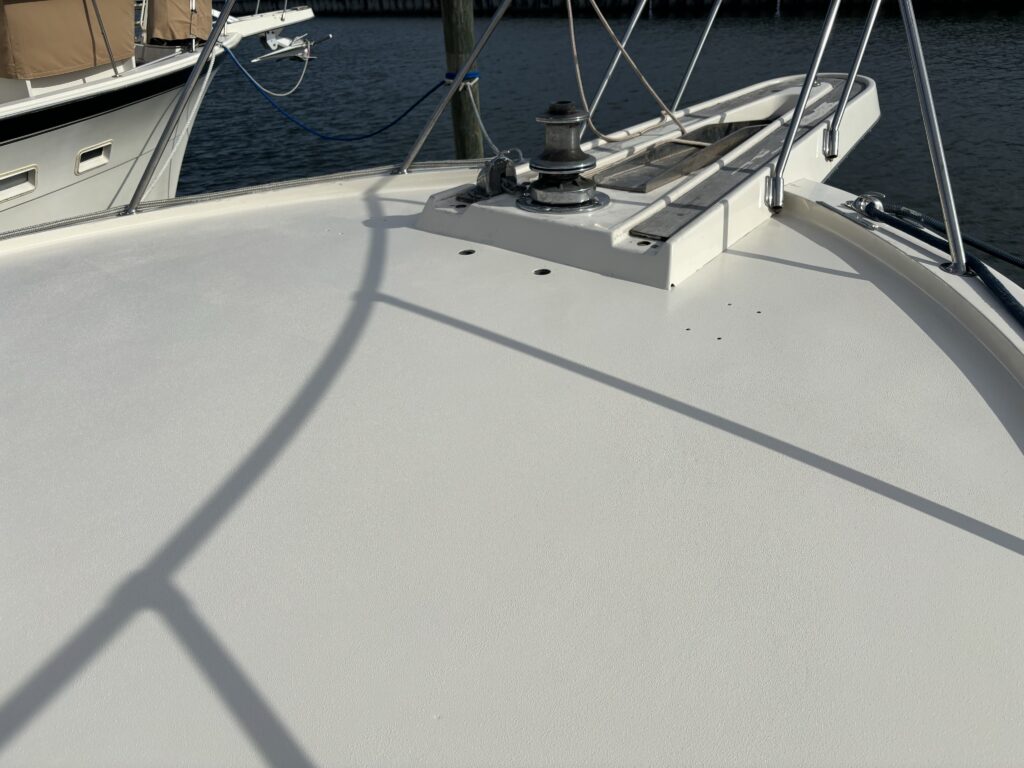
Once the Coosa board was in place, the topside was glassed over. Following the fiberglass, a fairing compound was spread across the entire area. Once fully cured, the fairing compound was sanded to create a perfectly smooth finish.

The new section of deck was then primed and painted. I used the same Awlgrip paint that I used in the projects detailed in the Part 1 and Part 2 blog posts. The application for this project was slightly different due to the non-skid necessity.
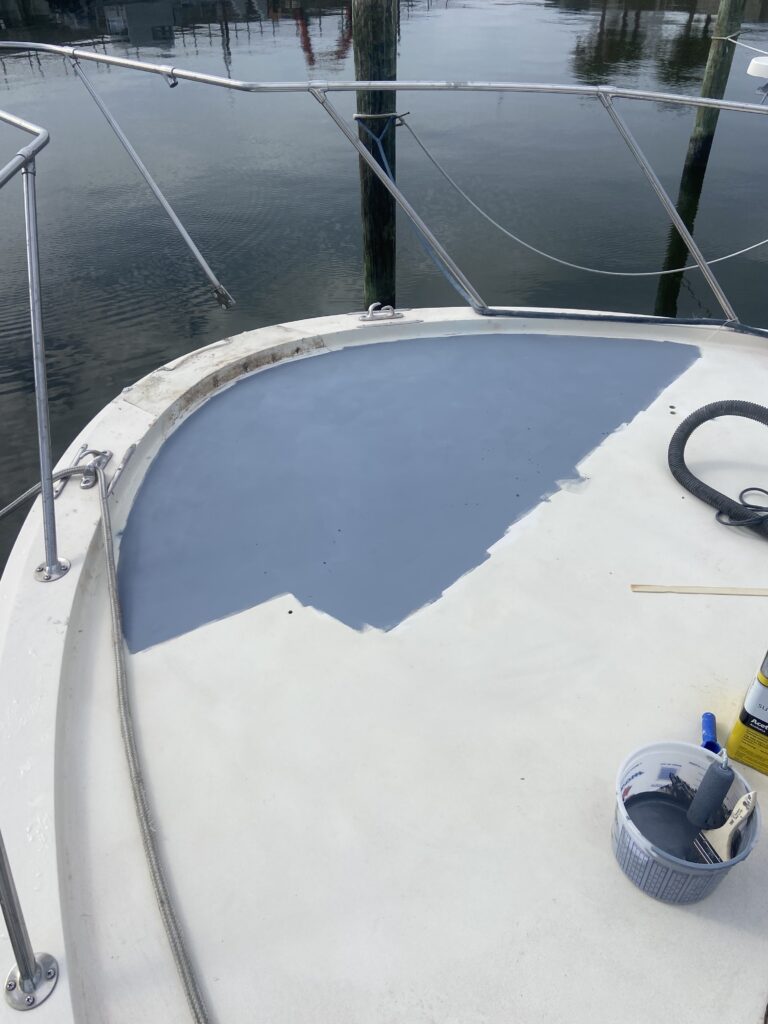
For the non-skid material, Awlgrip Griptex was used. It is spread on the deck right after the paint is applied. For the application a little creativity was needed.
A shaker, think parmesan shaker in a pizza restaurant, was filled with the non-skid material. It was then lightly shaken to spread the non-skid over the deck. A little was used at first and more gradually added to match the existing decking. With a little skill and a lot of luck, the amount of non-skid on the new deck matched the amount of non-skid on the existing deck.
Step 4 – Pulpit and Windlass Installation
With a little muscle, the pulpit went back into place without much trouble. Once in place, the holes through the pulpit for the windlass and securing bolts were used as guides to drill the new holes needed in the deck. Around each of those holes, a very healthy amount of marine grade caulking was applied.
A few sheets of plywood were laminated together with expoxy to create the necessary blocking between the pulpit and deck. It was necessary to sand the block to match the camber of the deck. The entire block of plywood was also coated in epoxy.
Getting the mounting plate on the windlass gearbox to perfectly line up with the four bolts coming through the deck was a challenge. Three bolts would go through the plate but the fourth would never line up. After a lengthy struggle, a machine shop was the chosen solution. They punched a new hole through the plate, which then allowed the fourth bolt to pass through.
Finished Product


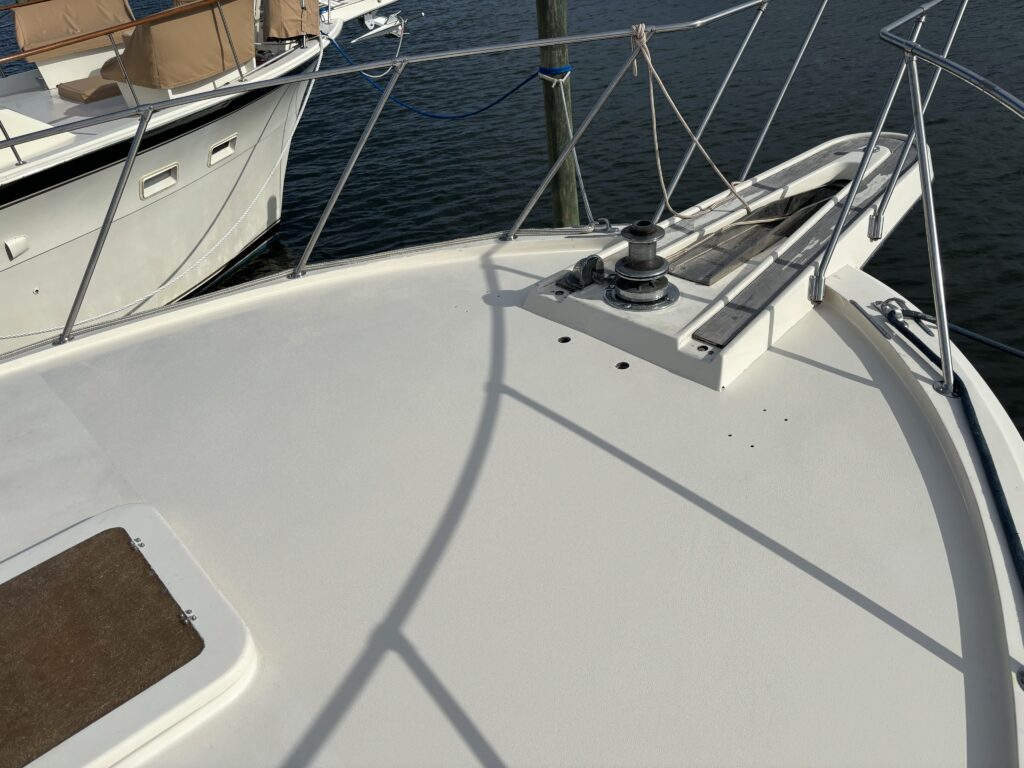
Pretty impressive!
I was hooked by this article’s engaging writing style!
The site consistently provides excellent content.